Gingerbread House Recipe
No experience or skills needed. Just your willingness
To avoid palm oil usage by 100% is quite difficult because it exist in almost every products that we are using in daily basis. So, in minimizing the consumption of palm oil, my husband and i decided to bake gingerbread house ourselves.
This recipe will be accompany with step by step pictures.
So here is what you may want to know :
- No mixer needed.
- Hand kneading.
- No Palm oil
- It is perfect for gingerbread cookies if you add frosting on it. Since this recipe has lesser sugar.
- You need to prepare the dough night before you bake it.
- Rolling pin is a necessary.
- Your gingerbread house may look crooked/not so perfect when it is done. But no worries. It will look great after your fabulous decoration anyway.
- This Recipe is enough to cover any mistakes you made along the way or 2 houses with my measurement.
Important Notes for a newbie like me
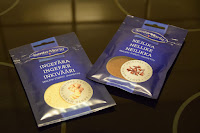 |
| Ground Ginger and Cloves by Santa Maria. (Any brand is just as good) |
 |
Perfectly measured ingredients is the key. Make sure the measurement is up to the top.
(Light Syrup) |
Ingredients
1.5 dl Sugar
3 tsp Ground Cinnamon
3 tsp Ground Cloves
3 tsp Ground Ginger
1 tsk Bicarbonate
9 dl Flour
1.5 dl Milk
1 dl Light Baking Syrup (I'm using Dan Sukker Ljus Sirap. You can substitute it with corn syrup)
50g Butter
Instruction
1.
 |
| Butter + Syrup + Sugar |
Preheat the oven to 175°c.
In a medium saucepan, add butter, sugar and syrup. Place the pan on medium-high heat.. With a spoon or spatula, stir the mixture until everything dissolve.
DO NOT STOP STIRING OR TAKE YOUR EYES OFF IT.
If it is boiling (try to avoid boiling point), remove it from the heat and keep on stiring.
 |
| You will get something like this. |
Remove from the heat once the mixture is dissolved. If your pan was too hot, make sure you keep stiring to avoid burnt at the bottom of the pan.
2.
 |
| Ground ginger + cloves + cinnamon |
Once the mixture dissolved, add in ground cinnamon, cloves and ginger and milk. I first used the spoon to mix them up. But then i changed to a whisk. It is much more easier.
Place the saucepan back on the medium heat if needed.
 |
| Remove from the heat |
Your mixture should look like this. I did moved the saucepan back on medium heat to help the spices to dissolve (it is still warm to touch. Not hot) .
Remove from the heat once everything seems harmony together.
Set it aside and let it cool down before the next step.
3.
 |
| cooled down mixture |
In a separate bowl, add in bicarbonate with a little flour. Do not add the entire flour just yet. Mix them both up well in the bowl.
Remember not to add the bicarbonate mixture if the liquid mixtures are cooled/room temperature.
 |
| Using a sifter to add dry ingredients to avoid clumps |
As my husband model in the picture. He used a sifter when adding bicarbonate mixture to avoid clumps and a whisk for a better mixture result.
He is then replaced the whisk with a spatula to fold the dough and continue adding flour little by little with the help of the sifter.
4.
 |
| At this point, the dough are getting thicker and a stronger spatula is needed |
The dough will eventually gets thicker as you added more flour. At this point my husband replace the spatula to a stronger ones.
 |
| Stronger and more durable. A ladle!😁 |
Keep mixing the dough. Its quite difficult at this point. I know. Hang on in there. It will be over soon.
5.
Remove the dough on to a flat surface.
Add the remaining flour and knead the dough.
Place your anger to it. But with love and care.
Continue kneading the dough and add more flour only if needed.
Knead until it is easy to mold.
The texture is still slightly sticky. Avoid adding too much extra flour.
Once done, wrap the dough in a plastic wrapper and leave it overnight in the fridge.
If you would like to know how i make my frosting and the glue to glue the house together, you can find it


Comments
Post a Comment